

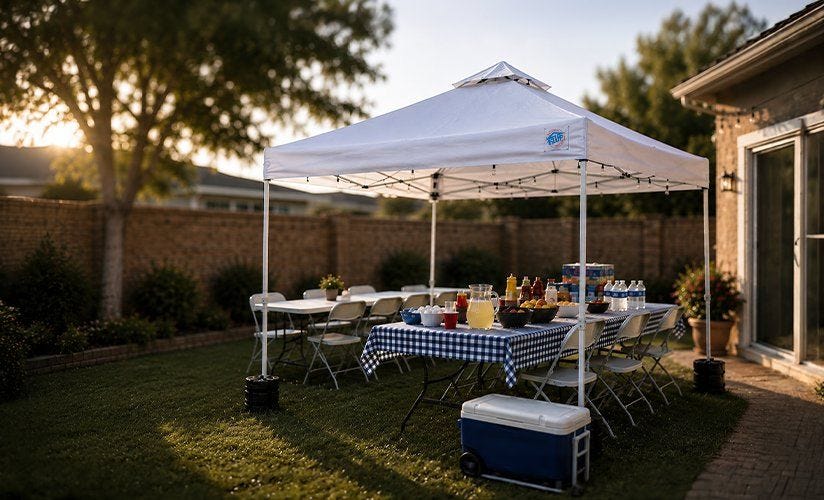
Installer une tente à baldaquin dans le jardin prend moins de 10 minutes une fois que vous avez compris la séquence de base. Toutes les tentes à baldaquin E-Z UP sont des abris instantanés monobloc, ce qui signifie qu'aucun poteau ou support séparé n'a besoin d'être assemblé. Il vous suffit d'agrandir le cadre, de fixer les serrures, de relever les pieds et d'ancrer la tente au sol. Cela dit, chaque modèle de tente à baldaquin est livré avec ses propres instructions de montage spécifiques.
Vérifiez toujours votre manuel du produit avant de commencer. Les étapes ci-dessous couvrent le processus général qui s'applique à la plupart des abris instantanés E-Z UP.
Que devez-vous faire avant de commencer l'installation de votre tente à baldaquin ?
Choisissez une zone plate et ouverte avec suffisamment d'espace autour des quatre côtés de la tente. Pour une tente à baldaquin standard, prévoyez quelques pieds supplémentaires de chaque côté lors de l'extension du cadre.
Avant de commencer, faites une vérification rapide :
- Retirez le cadre monobloc plié du sac de transport et placez-le à plat sur le sol
- Confirmez que le tissu de la tente est fixé au cadre tel qu'il est sorti du sac
- Préparez vos piquets de sol ou sacs de poids à proximité
- Vérifiez les conditions météorologiques avant de vous engager dans une installation complète
Deux personnes rendent l'étape d'expansion plus facile et plus sûre. Une installation en solo est possible avec certains modèles E-Z UP, en particulier ceux dotés de la technologie ONE-UP, mais avoir une deuxième personne accélère les choses les jours de vent.
Comment étendre le cadre d'une tente à baldaquin monobloc ?
Parce que les tentes à baldaquin E-Z UP sont des conceptions monobloc, le tissu de la tente fait déjà partie du cadre lorsque vous le sortez du sac. Il n'y a pas de poteaux séparés à insérer ni de supports à connecter. Le cadre doit simplement être ouvert.
Avec une personne de chaque côté, saisissez le cadre et reculez lentement. Le cadre s'ouvrira en accordéon lorsque vous le séparerez. Maintenez le mouvement régulier et uniforme. Tirer trop fort d'un côté peut entraîner une ouverture inégale du cadre.
Ne déployez pas complètement les pieds à ce stade. Étendez d'abord le cadre supérieur, puis passez aux pieds.
Verrouillage du cadre supérieur
Une fois le cadre supérieur entièrement ouvert, allez à chaque coin et poussez le mécanisme de glissière vers le haut jusqu'à ce qu'il s'enclenche fermement. C'est ce qui maintient la structure de la tente rigide. Si un curseur est rigide ou ne se verrouille pas, le cadre peut ne pas être encore entièrement déployé. Tirez un peu plus les fermes vers l'extérieur, puis réessayez.
Vérifiez les quatre coins avant de continuer. Un coin déverrouillé suffit à rendre toute la structure instable.
Comment relever les pieds correctement ?
Une fois le cadre supérieur verrouillé, commencez à soulever la tente du sol. Placez votre pied sur la plaque de base au premier coin pour la stabilité. Soulevez le pied télescopique intérieur vers le haut jusqu'à ce qu'il s'enclenche dans le premier réglage de hauteur.
Travaillez en diagonale plutôt que de faire le tour de la tente dans l'ordre. Avant gauche puis arrière droit. Arrière gauche puis avant droit. Cela maintient la tente de niveau lorsqu'elle monte et réduit la tension sur les articulations du cadre.
Une fois que les quatre pieds sont en première position de hauteur, vérifiez à nouveau les verrous du cadre supérieur, puis relevez chaque pied à la hauteur finale que vous préférez. La plupart des modèles E-Z UP offrent deux ou trois options de hauteur. Pour un rassemblement décontracté dans le jardin, le réglage à mi-hauteur a tendance à bien fonctionner. Le réglage le plus haut offre plus d'espace en dessous mais prend également plus de vent.
Encore une fois, les instructions de votre modèle spécifique vous indiqueront les réglages de hauteur exacts et la méthode de verrouillage de votre tente.
Comment ancrer une tente à baldaquin dans le jardin ?
Cette étape est non négociable. Une tente à baldaquin non ancrée est un risque pour la sécurité. Même par un après-midi calme, une rafale soudaine peut retourner une tente non sécurisée.
Sur l'herbe ou la terre : enfoncez les piquets de sol à travers les trous de chaque plaque de base à un angle de 45 degrés, en les pointant vers l'extérieur de la tente. Cet angle offre une tenue nettement supérieure à celle des piquets droits.
Sur un patio ou du béton : utilisez des sacs de poids ou des plaques de poids enroulés autour de chaque pied. Un point de départ général est d'environ 20 à 25 livres par pied pour une installation de tente à baldaquin standard dans le jardin. Allez plus lourd s'il y a du vent.
Un exemple concret rapide : si vous installez une tente à baldaquin pour une fête d'anniversaire dans le jardin et que les prévisions de l'après-midi annoncent des rafales, positionnez le côté fermé de la tente face au vent. Cela réduit la surface sur laquelle le vent pousse et soulage la pression sur le cadre. L'ajout d'une paroi latérale du côté au vent peut également aider, mais n'oubliez pas que les parois latérales augmentent la charge du vent, alors ajoutez un poids d'ancrage supplémentaire lorsqu'elles sont utilisées.
Quelles erreurs de montage devez-vous éviter ?
La plupart des problèmes de montage de tentes à baldaquin se résument à quelques erreurs répétées.
Sauter le levage diagonal des pieds est le plus courant. Soulever un côté complet avant l'autre fait que le cadre est de travers, ce qui sollicite inégalement les articulations.
Ne pas verrouiller complètement les curseurs du cadre supérieur avant de relever les pieds est le deuxième problème le plus courant. Cela laisse la structure supérieure lâche et donne à toute la tente une sensation d'instabilité une fois qu'elle est debout.
S'appuyer uniquement sur des piquets sur une surface dure en est un autre. Les piquets ne fonctionnent pas sur le béton. Les sacs de poids sont le bon outil pour les patios et les allées.
Si vous n'êtes jamais sûr d'une étape spécifique sur votre modèle, consultez la feuille d'instructions fournie avec votre tente. Chaque tente à baldaquin E-Z UP a sa propre séquence de montage et le manuel est le guide le plus précis pour votre produit spécifique. Vous pouvez également parcourir la collection complète de tentes à baldaquin pour trouver des ressources d'installation et des détails spécifiques au modèle.
Quelle tente à baldaquin E-Z UP convient le mieux à une utilisation dans le jardin ?
La tente à baldaquin 10x10 est la taille la plus pratique pour la plupart des installations de jardin. Elle couvre suffisamment de terrain pour une table à manger et plusieurs chaises sans être surdimensionnée pour une cour typique. C'est aussi la taille la plus facile à gérer lors du montage et du démontage.
Pour les grands rassemblements où vous avez besoin de couvrir plus d'espace, le 10x20 offre le double de la couverture tout en utilisant le même processus d'installation d'abri instantané monobloc de base.
Si la résistance au vent est une priorité, les modèles de tentes à baldaquin ventilées E-Z UP, comme la Pyramid Vented, permettent au vent de passer à travers le haut plutôt que de s'accumuler en dessous. Cela fait une réelle différence les jours de rafales.
Pour plus de conseils sur le choix du bon modèle pour les conditions extérieures, lisez l'article E-Z UP sur la façon de choisir les meilleurs auvents pop-up pour la pluie et le vent. Pour des conseils de montage et de démontage rapides spécifiques aux modèles E-Z UP, consultez le guide de montage et de démontage facile sur le blog E-Z UP.
Conclusion
Réussir l'installation de votre tente à baldaquin dans le jardin dépend de l'ordre des choses. Dépliez le cadre uniformément, verrouillez les curseurs supérieurs avant de toucher les pieds, relevez les pieds en diagonale et ancrez correctement chaque coin avant de vous éloigner.
Comme toutes les tentes à baldaquin E-Z UP sont des abris instantanés monobloc, il n'y a pas de poteaux lâches ou de supports séparés à gérer. Le processus est simple. Assurez-vous simplement de suivre les instructions spécifiques fournies avec votre modèle, car les mécanismes de verrouillage exacts et les réglages de hauteur varient d'une tente à l'autre.
Foire aux questions
Comment monter une tente à baldaquin seul ?
La plupart des tentes à baldaquin E-Z UP peuvent être montées en solo grâce au cadre d'abri instantané monobloc. Déployez le cadre lentement du centre vers l'extérieur, verrouillez les curseurs supérieurs à chaque coin, puis relevez les pieds un par un en utilisant votre pied sur la plaque de base pour le soutien. Vérifiez toujours les instructions spécifiques de votre modèle en premier.
Comment monter une tente à baldaquin 10x10 seul ?
Placez le cadre monobloc plié sur un sol plat, dépliez-le vers l'extérieur jusqu'à ce que le cadre supérieur se verrouille en place, puis relevez chaque pied télescopique en diagonale jusqu'à ce que les quatre coins soient verrouillés à la même hauteur. Une tente à baldaquin 10x10 est l'une des tailles les plus faciles à gérer seul par temps calme.
Comment monter une tente à baldaquin sans piquets ?
Sur des surfaces dures comme une terrasse ou du béton, ne mettez pas de piquets et utilisez des sacs de poids ou des plaques de poids enroulés autour de chaque pied à la place. Environ 20 à 25 livres par pied est un bon point de départ pour une installation de tente à baldaquin standard dans le jardin par vent léger.
Comment empêcher un auvent escamotable de s'envoler ?
Utilisez des piquets de sol inclinés à 45 degrés vers l'extérieur sur l'herbe et des sacs de poids sur les surfaces dures. Positionner le côté fermé de la tente à baldaquin face au vent aide également à réduire la charge sur le cadre par vent de travers.
Comment ancrer une tente à baldaquin par vent ?
Combinez des piquets et des sacs de poids pour une tenue maximale. Si votre tente à baldaquin a des parois latérales attachées, la charge du vent augmente et vous devriez utiliser des poids d'ancrage plus lourds sur chaque pied. Ancrez toujours les quatre coins, pas seulement les coins face au vent.