
Somebody orders a custom canopy, gets excited when it arrives, opens the bag, and immediately knows something went wrong. The logo is the size of a dinner plate when it should be covering half the canopy top. The blue is slightly off. The whole thing looks like it belongs at a school fundraiser, not a trade show.
This happens constantly. Not because the printing was bad but because the decisions made before ordering were bad.
Here is the actual order to do this in.
Step One: Choose the Right Tent Before Touching the Design
The frame matters more than people realize when they are focused on graphics.
Thin frames flex. When a frame flexes the canopy fabric does not sit flat and a canopy that does not sit flat makes even a great print look uneven and cheap. The design is only as good as the surface it is on.
At E-Z UP our Eclipse™ is where most serious buyers land. Aircraft-grade aluminum, flat canopy top, built to hold its shape under actual outdoor conditions. For teams running events every single weekend the Endeavor™ is worth the conversation. Patented octagonal legs, genuinely stronger, handle wind without drama. Neither of these is an entry-level purchase and that is the point. You are putting your brand on this thing. It needs to hold up.
Pick the frame first. Everything else follows from that.
Step Two: Figure Out Where Your Branding Goes Before Picking Colors
Most people open the design tool and immediately start choosing colors. Wrong order entirely.
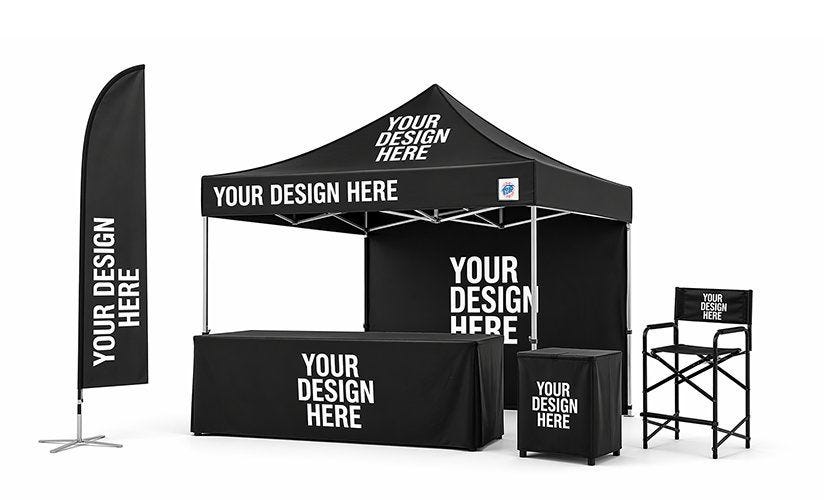
The canopy top is the surface people see from across the venue, from a parking lot, from two aisles away at a trade show. The valance wraps around the lower edge of the roof and sits right at eye level when someone walks toward you. Sidewalls are optional but they close off the space and add serious surface area for messaging.
Each surface does a different job. The top is visibility. The valance is the first thing someone reads up close. The sidewalls are where you can get into product shots, taglines, anything that needs room to breathe.
Decide what message goes on which surface before a single color gets picked. At E-Z UP our design team works through this with customers because getting the placement right is half the battle and it is a decision that cannot be undone after production starts.
Step Three: Make the Design Simpler Than Feels Right
A major mistake that most people make is considering the tent as a brochure and trying to accumulate all details like taglines, website, social handles, product shot, secondary logo and everything on the tent itself. What they fail to realize is that there is no point in doing that, as none of that registers when someone is twenty feet away moving through a crowded event space. What registers is a color that stops them and a logo that confirms who you are. Basically, the tent is not a brochure. It does not need to tell the whole story.
The best advertising canopy tents are almost always the ones that committed hard to one color and kept everything else minimal. Walk any major trade show and the booths that pull people in are not the busy ones. They are the ones where you can tell who it is from across the room.
Bold color does more work than any graphic element at an event. Pick the strongest color in your brand palette and let it own the canopy.
Step Four: Get Your Files Right or Nothing Else Matters
This is the step that causes the most damage and it is entirely avoidable.
A logo that looks clean on a website is often a low resolution file that was never meant to be printed at canopy scale. Stretch it across a ten by ten canopy top and it turns soft and muddy. The print looks unprofessional not because of the printing but because of what went into it.
Vector files are the right format. If a vector file does not exist for the logo, a high resolution raster file can work but it needs to be genuinely high resolution, not something exported from a website screenshot.
Our team reviews every artwork file before anything goes to production and sends a proof back for approval. That proof is not a formality. Instead, it is the moment to look carefully, check colors against your actual brand, confirm placement, make sure text is readable. Rushing through the proof stage is where people end up with a tent that is almost right, which is its own kind of frustrating.
Step Five: Build the Full Setup, Not Just the Tent
A custom canopy tent with logo on the top sitting above a plain white table cover is a half-finished setup. The table is visible. The chairs are visible. The sidewalls are visible. All of it reads as either part of the brand or not part of anything.
Coordinated setups look intentional. Mismatched setups look like the branding budget ran out before the accessories got ordered.
At E-Z UP we print everything in-house. Canopy tops, sidewalls, table covers, banners, flags, chairs. Our Custom Eclipse™ Package puts the tent, table cover, and director chair together in one order so the whole thing arrives matching. For anyone heading into a trade show, a brand activation, or any event where the booth represents the company to a room full of potential customers, that coordination is not optional. It is the difference between a setup that looks like it belongs there and one that looks assembled the night before.
Step Six: Build in Enough Time
Custom printing at E-Z UP runs ten business days or less after the design is approved. Rush processing in 48 hours is available when the deadline is genuinely close.
But the proof review takes time if it is done properly. Changes after the first proof add time. Artwork issues that need fixing add time. Ordering two weeks out is the minimum for a calm experience. Three weeks is better. The events that go well are almost never the ones where the tent was ordered the week before.
Making It Count
Designing a branded canopy tent for marketing events is not a one-afternoon task if the result needs to be right. The frame choice, the surface decisions, the artwork quality, the accessory coordination, each of those calls shapes what people see when they walk past the booth.
Get them right and the tent does real work. It stops people. It holds attention long enough for a conversation to start. It puts the name in front of everyone who walks past all day, not just the ones who stop.
That is a lot of return from something that fits in a bag and goes up in under a minute. But only if the design decisions behind it were made in the right order.
FAQs
What is a custom canopy tent?
A portable pop-up shelter with your branding printed directly onto the canopy fabric. Logo, colors, messaging, all of it goes on the tent so it works as a shade structure and a marketing tool at the same time. At E-Z UP everything is printed in-house at our California facility, which means quality control stays tight and the graphics hold up through years of outdoor use.
How much does a branded canopy tent cost?
The cost of a canopy tent completely depends on the size, the frame, and which surfaces are being printed. A serious branded setup with accessories is a genuine investment but it pays back fast when the tent is going to events regularly. Cheap tents fade, bend, and need replacing within a season. The math works out better on the side of buying right once.
Are custom pop-up tents good for trade shows?
One of the best tools available at a trade show. A well-designed custom event pop-up tent pulls attention before anyone reads a sign or hears a pitch. It makes the booth look like something worth stopping at, which is the whole problem at a crowded event. Over sixty percent of Fortune 500 companies trust E-Z UP tents, and trade shows are a big part of why.
Can I print my logo on all sides of the canopy tent?
Yes. Canopy top, valance, and sidewalls can all carry branding. Full coverage across every surface is an option and makes sense for brands where visibility from every angle matters, which is most of them at a busy event.
How long does it take to design a custom canopy tent?
If the artwork is ready and decisions are made the design process moves quickly. Production after approval is ten business days or less, with 48-hour rush available. Budget at least two weeks from start to delivery if the event date is fixed and there is no room to be flexible.